


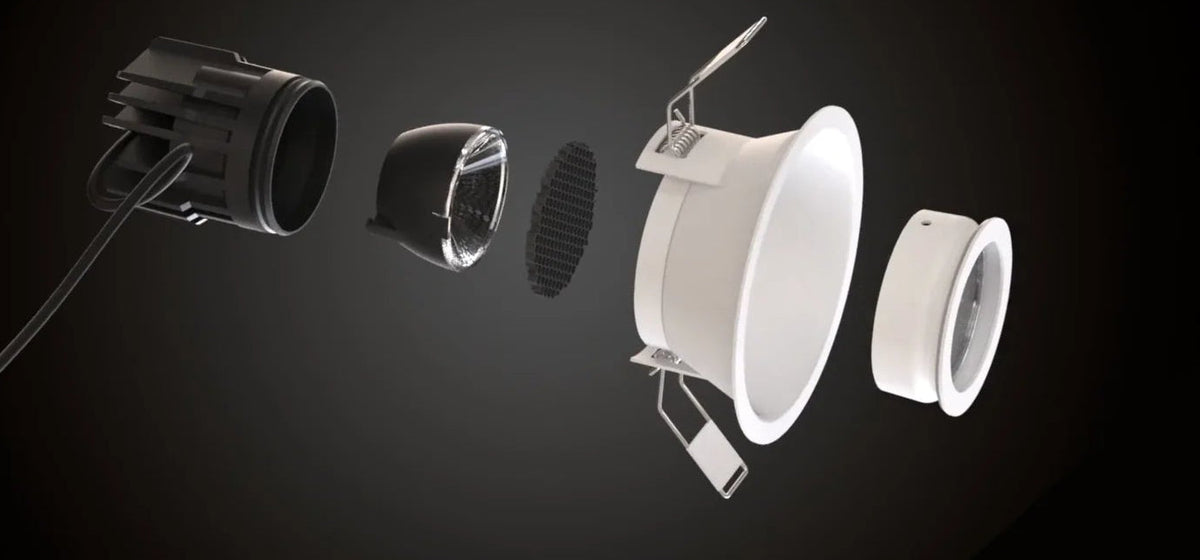
Find the right Astro Downlight PRO for every room.
Browse the four Pro styles, choose your beam angle, light engine, optional filters and dimming, and see the specs for each downlight. Build a list room by room, then save, share, request a quote or add it all to your cart.
How to design with the Pro range
Great lighting isn't about filling the ceiling with lights. It's about putting light where you'll notice it. Here's how our lighting team uses the Pro range.
1. Start with what you want to light
Before you place a single downlight, decide what matters in the room: the benchtop, the artwork, a feature wall, the dining table. Then build the light in three layers:
- General light, so you can move around safely.
- Task light, where you work, cook or read.
- Accent light on walls, art and features. This is the layer that makes a room feel finished.
2. Choose your style
- Minima Pro: compact and refined, with IP65 versions for wet areas. The only style in matt black.
- Pinhole Pro: a small opening with the light source set deep inside, for very low glare.
- Trimless Pro: plastered into the ceiling, so there's no visible edge. Needs a plasterer.
- Decor Pro: a clean round trim and the best value in the range, with the most light per fitting.
3. Choose your light engine
- Edge: high output and high efficacy, CRI 90+. Best where you need more light from fewer fittings: kitchens, high ceilings, commercial spaces.
- Essence 2700K: CRI 95+ for the richest colours, skin tones and finishes. Best for bedrooms, living rooms and anywhere you relax.
As a guide, 2700K suits living spaces, 3000K kitchens and bathrooms, and 4000K offices and workspaces.
4. Choose your beam
- 47° wide: soft, even general light, best at standard 2.4-2.7 m ceilings.
- 30° medium: general and task light, and the go-to for washing walls.
- 21° narrow: artwork, a hero table or a feature, and for reaching down from high ceilings.
The higher the ceiling, the narrower the beam you need to get light to the floor.
5. Light the walls
Bright walls make a room feel bigger and calmer, and let the general light run lower. Use adjustable Pro downlights tilted 25-30°:
- At a 2.7 m ceiling, set them about 450-600 mm out from the wall or joinery.
- At 3.3 m, about 1.1 m out to wash shelving top to bottom.
- At 4.5 m, about 1.1-1.2 m out to land a narrow beam on artwork.
6. Put lights where you stand
- Benches: place the light over the front edge of the benchtop, so you work in front of it, not in your own shadow.
- Tables: centre one or two narrow beams over the table, not the room.
- Beds and sofas: avoid putting a downlight directly above where your head goes.
7. Aim for the right light levels
| Space | Target |
|---|---|
| General light in living areas | 100-200 lux |
| Benches and islands | 300-500 lux |
| Desks | 300-500 lux |
| Vanity for grooming | 400-600 lux |
| Dining table | 150-300 lux |
The Light levels view in every plan shows exactly what your design achieves.
8. Switch and dim in groups
Put each layer on its own switch, such as general, bench, feature wall and dining, and dim them separately. That's how one room works for cooking, entertaining and a quiet night in. Choose Phase dimming for most homes, or DALI for scene control in larger homes and commercial projects.
9. Control glare
Every Pro style sets the light source back inside the fitting. For even more comfort, add a Honeycomb filter, or choose Pinhole Pro.
10. Wet areas
Use IP65 versions over and near showers and baths. Bathroom zones are set by AS/NZS 3000 (the Wiring Rules), so check with your electrician.
11. Before you buy
- Pro downlights are for plasterboard ceilings. Allow 150 mm of space above the ceiling.
- Keep insulation clear: about 200 mm across and 120 mm above each light.
- Each downlight has its own driver, placed in the ceiling within 2 m of the light.
- Mains wiring must be done by a licensed electrician.
12. Spend where it shows
- Higher-output Pro fittings mean fewer ceiling cut-outs, less wiring and less installation time.
- Want the same light levels for less? Try the Essential layout in our lighting plans: fewer fittings, our best-value Decor Pro, and every area still on target.
Is the Astro Downlight PRO range right for you?
Downlight PRO is Astro's architectural downlight range. Each downlight is built to order from your choice of style, light engine, beam and dimming.
It's a great fit if you want to:
- Choose a look. Four styles: Minima (slim 3 mm trim, black or white), Pinhole (lowest glare), Trimless (plastered in, no visible edge) and Decor (clean white trim, the brightest).
- Control glare. Every style sets the light back inside the fitting, and a Honeycomb filter can cut glare even further.
- Pick the right light. Narrow, Medium or Wide beams; warm 2700K, 3000K or cooler 4000K; or Essence for premium colour (CRI 95+).
- Dim smoothly. Phase dimming works with most wall dimmers (5-100%). DALI suits control systems (1-100%).
- Light a bathroom. IP65 versions are made for wet areas such as over a shower.
Think twice if:
- Your ceiling is not plasterboard. These downlights are for plasterboard ceilings only, not solid or concrete ceilings.
- The ceiling space is tight. Allow 150 mm above the ceiling. They must not be covered by insulation: keep a clear space about 200 mm across and 120 mm above each light.
- You don't want a driver in the ceiling. Each downlight comes with its own driver, which sits in the ceiling space within 2 m of the light. A licensed electrician must install them.
- You need them tomorrow. They are built to order. Built to order, 2-4 week lead time.
Not sure yet?
Add downlights to your specification and use Request a quote. We'll check your choices with you before you buy.
Request a quote
Your specification is attached to the message. We'll check it with you and come back with a quote.
Save, print or share your specification
Saved specifications stay in this browser on this device. To open a specification on another device, or send it to someone, use the link. Your latest specification is also kept automatically.